Cornhole is a classic outdoor game that provides hours of fun for family gatherings, backyard parties, and tailgating events. If you’re a DIY enthusiast and want to add a personal touch to your cornhole game, building your own cornhole boards can be a rewarding project. In this article, we will guide you through the step-by-step process of building your own DIY cornhole boards. Building for kids? More ideas that are family related? Visit LifeWithKidsBlog.com
Materials You’ll Need
- Two 2’x4′ plywood sheets (3/4-inch thickness)
- Four 2’x4′ boards (8-foot length)
- Circular saw or miter saw
- Jigsaw
- Measuring tape
- Drill
- Screws
- Wood glue
- Sandpaper
- Paint or stain
- Painter’s tape
- Outdoor polyurethane sealant
Step 1: Cutting the Plywood
- Start by cutting the two plywood sheets to the standard cornhole board size of 2’x4′. Measure and mark the dimensions on the plywood, then use a circular saw or miter saw to make the cuts.
- Once you have the two plywood boards, sand the surfaces to remove any rough edges or splinters.
Step 2: Building the Frame
- Cut the four 2’x4′ boards into eight 48-inch pieces for the frame. These will serve as the sides and legs of the cornhole boards.
- Take two of the 48-inch boards and attach them to the sides of one plywood sheet using screws and wood glue. These will be the top and bottom frame pieces.
- Attach the remaining two 48-inch boards to the sides of the second plywood sheet, ensuring that they are parallel to the top and bottom frame pieces.
- Cut four 21-inch boards from the remaining 2’x4′ boards. Attach them between the two frame pieces on each board, creating the side supports.
Step 3: Cutting the Cornhole Holes
- Measure 9 inches down from the top of each board and 12 inches in from each side. Mark these measurements on the plywood.
- Use a jigsaw to carefully cut out the marked areas to create the cornhole holes. Sand the edges of the holes to ensure a smooth finish.
Step 4: Finishing Touches
- Sand all the surfaces of the boards to remove any rough spots or imperfections.
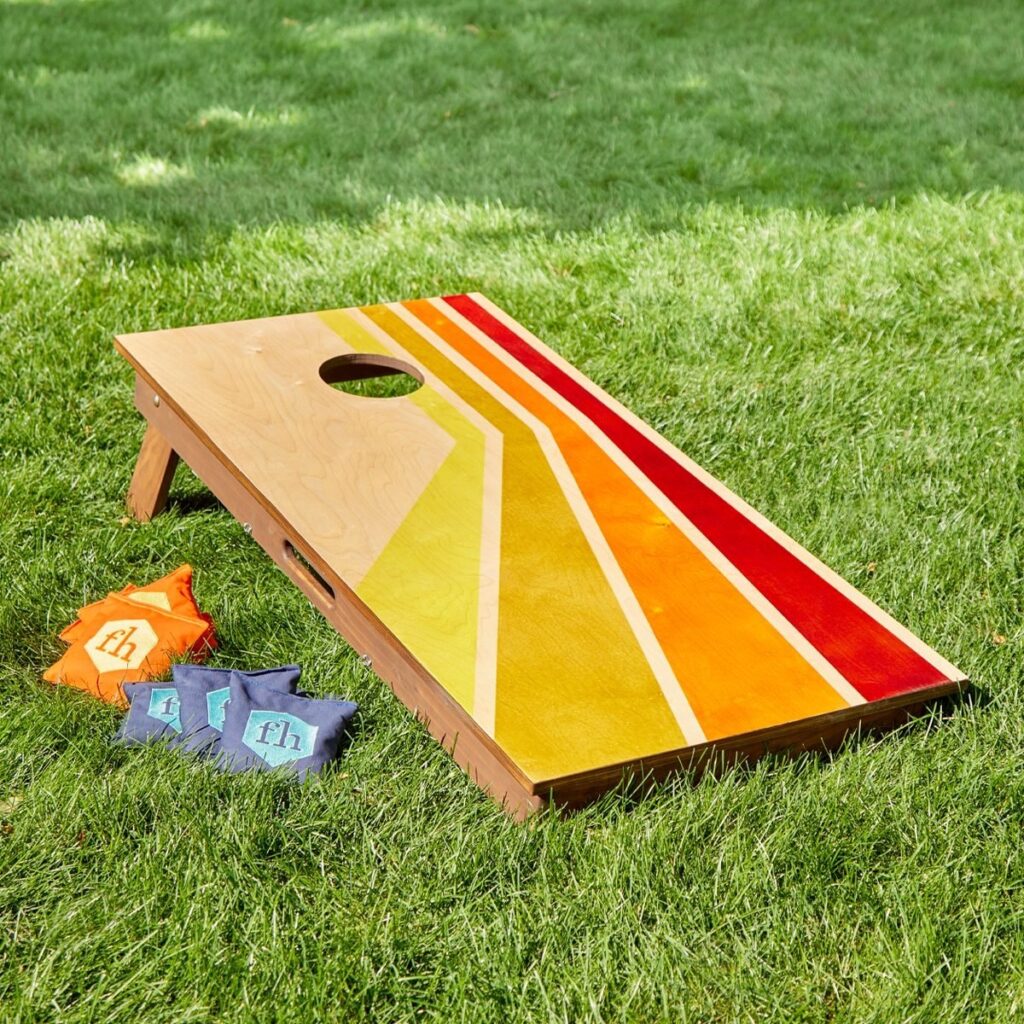
- Apply a coat of paint or stain to the boards, allowing them to dry completely. You can get creative with colors and designs to personalize your cornhole boards.
- Once the paint or stain is dry, use painter’s tape to create any desired patterns or lines. Apply a contrasting color of paint, then remove the tape to reveal the design.
- Apply a coat of outdoor polyurethane sealant to protect the boards from weather and wear. Allow the sealant to dry according to the manufacturer’s instructions.
Step 5: Enjoying Your DIY Cornhole Boards
Once your DIY cornhole boards are complete, it’s time to enjoy the game! Set them up in your backyard, at a park, or wherever you like to play. Gather some cornhole bags and invite friends and family to join in the fun.
Remember to store your cornhole boards in a dry place when not in use to keep them in good condition. With proper care, your DIY cornhole boards will provide countless hours of entertainment for years to come.
Building your own cornhole boards is a satisfying DIY project that allows you to customize your game equipment. By followingf these steps and using your creativity, you’ll have a set of personalized cornhole boards that will impress your friends and elevate your outdoor gatherings.
For more cool ideas visit DiyHomeWizard.com
As an Amazon Associate we earn from qualifying purchases through some links in our articles.