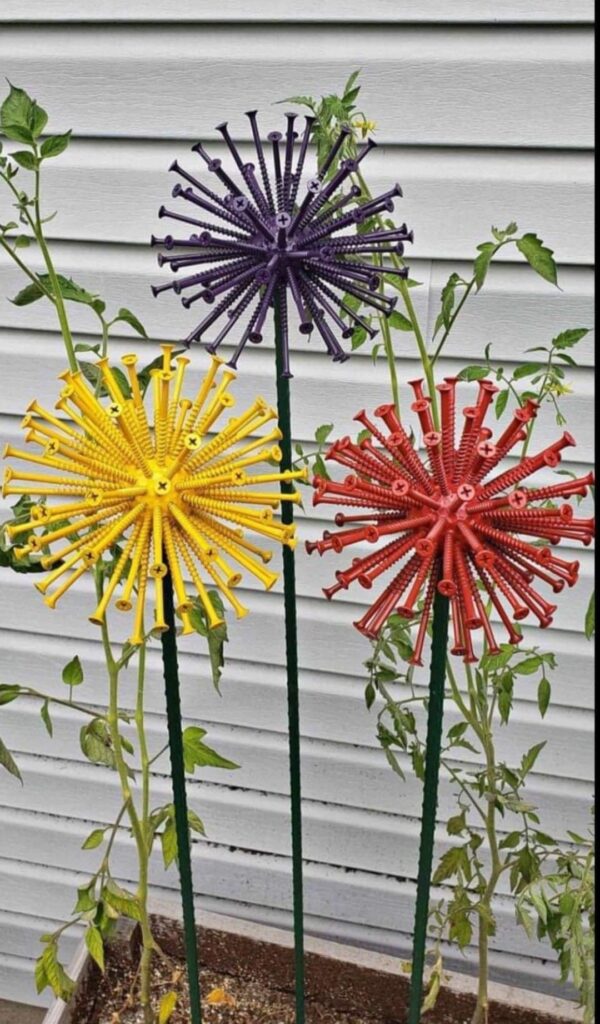
Welcome to Garden Mastery, where we bring you unique and creative DIY projects for your garden. Today, we’re going to show you how to create a stunning garden ornament using golf balls, screws, a stick, and some paint. This project is not only easy and fun, but it also adds a unique touch to your garden. Let’s get started!

Materials You’ll Need:
- Golf balls
- Screws
- A sturdy stick or rod
- Paint (any colors you prefer)
- Paintbrushes
Step-by-Step Guide:
Step 1: Gather Your Materials
Before you start, make sure you have all the materials at hand. This will make the process smoother and more enjoyable.
Step 2: Insert Screws into the Golf Balls
The first step in creating your garden ornament is to insert screws into each golf ball. Be careful not to crack the golf balls when doing this.
Step 3: Mount the Golf Balls onto the Stick
Once you’ve inserted the screws into the golf balls, it’s time to mount them onto your stick or rod. You can arrange them in any pattern you like.
Step 4: Paint Your Golf Balls
Now comes the fun part – painting the golf balls! You can choose any colors you like and even create patterns or designs on the golf balls.
Step 5: Let Your Garden Ornament Dry
After painting the golf balls, let your garden ornament dry completely. This could take a few hours or even overnight, depending on the type of paint you used.
This DIY golf ball garden ornament is a fun and creative way to add a personal touch to your garden. Not only is it easy to make, but it also allows you to repurpose old golf balls. So why not give it a try? We’re sure you’ll be amazed at how cool it looks in your garden!
As an Amazon Associate we earn from qualifying purchases through some links in our articles.


